Welcome to the exciting world of 3D printing! Whether you’re a seasoned maker or just starting out, one tool consistently stands out as the backbone of successful prints: Ultimaker Cura. As your dedicated guide from WMTSV.com, with over 15 years immersed in additive manufacturing, I’m here to demystify this powerful software. Cura isn’t just a program; it’s your indispensable partner in transforming digital designs into tangible realities, bridging the gap between your 3D model and your 3D printer. It’s the brains behind the brawn, translating intricate designs into precise instructions your printer understands – a language known as G-code.
Getting your 3D models ready for printing can sometimes feel like a puzzle, but with Ultimaker Cura, it becomes an intuitive process. Developed by Ultimaker and constantly refined by a vibrant open-source community, Cura simplifies complex technicalities while offering unparalleled control. It’s designed to empower users, ensuring safe, efficient, and high-quality results for everything from rapid prototypes to functional end-use parts. Let’s dive in and unlock the full potential of your 3D printing journey with Cura.
Why Cura is Your Go-To 3D Printing Slicer
Choosing the right slicing software is paramount to your 3D printing success. Ultimaker Cura has earned its reputation as a leading choice for several compelling reasons:
Open-Source and Free Accessibility
|
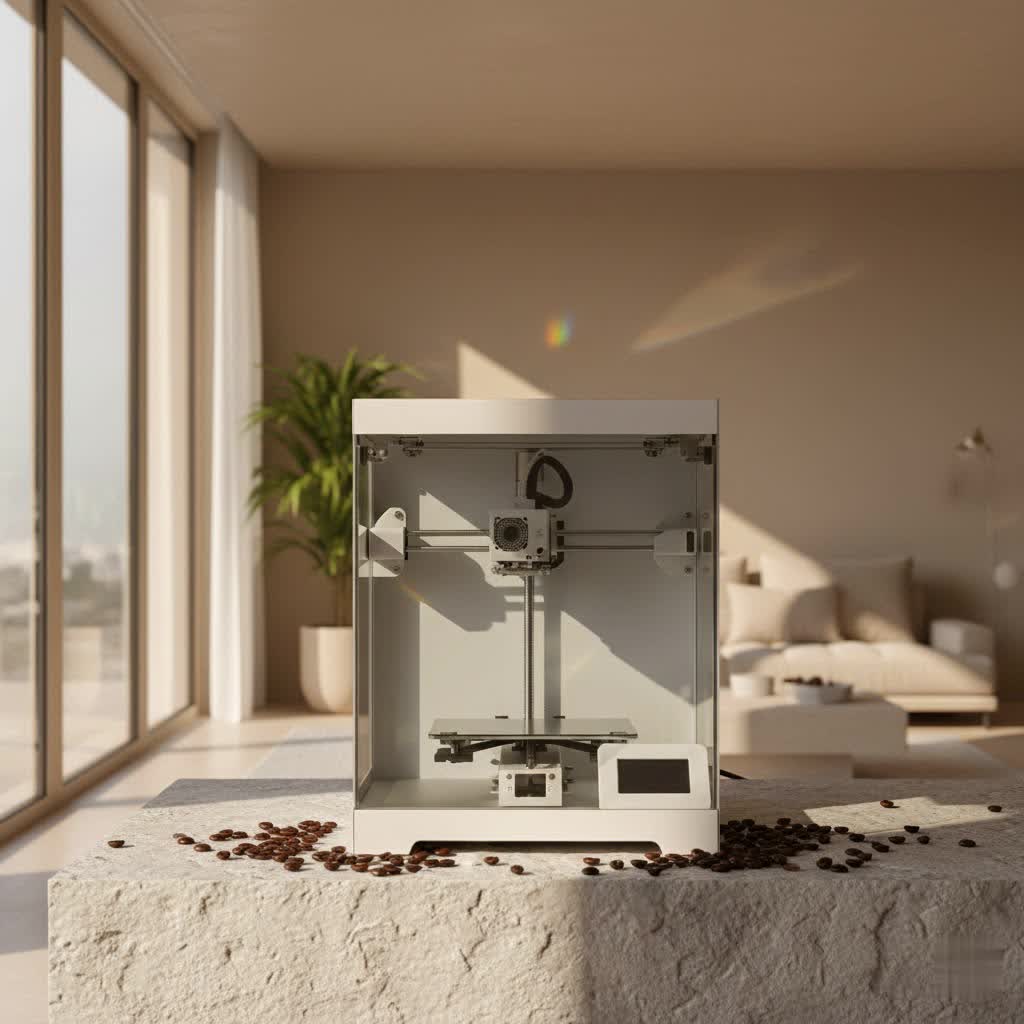
Our Picks for the Best 3D Printer in 2026
As an Amazon Associate I earn from qualifying purchases.
|
||
| Num | Product | Action |
|---|---|---|
| 1 | FLASHFORGE AD5X Multi-Color 3D Printer with IFS, 600mm/s High Speed, 300°C High Temp Direct Extruder, Fully Auto Leveling, All Metal CoreXY,4-Color Printing for PLA-CF,PETG-CF, 220x220x220mm |

|
| 2 | FLASHFORGE AD5M 3D Printer Fully Auto Calibration Print with 1-Click Max 600mm/s Speed, All-Metal CoreXY Structure Precise Printing, Easy-Maintenance Quick-Swap Nozzle, Print Size 220x220x220mm |
|
| 3 | FLASHFORGE AD5X Multi-Color 3D Printer 4 Colors with IFS, Fully Auto Leveling FDM 3D Printer with Max 600mm/s High Speed Printing and Max 300°C Nozzle, Large Printing Size 220 * 220 * 220mm |
|
| 4 | FLASHFORGE Adventurer 5M Pro 3D Printer with 1 Click Auto Printing System, 600mm/s High-Speed, Quick Detachable 280°C Nozzle, Core XY All-Metal Structure, Multi-Functional 220x220x220mm 3D Printer |
|
| 5 | FLASHFORGE AD5M Pro 3D Printer 600mm/s High Speed & Precision, Full-Auto Calibration with 0.4&0.6mm Nozzle Bundle, CoreXY Structure & Auxiliary Chamber Cooling, ≤50 dB Quite Printing Camera Printers |
|
| 6 | FLASHFORGE Adventurer 5M 3D Printer with Fully Auto Leveling, Max 600mm/s High Speed Printing, 280°C Direct Extruder with 3S Detachable Nozzle, CoreXY All Metal Structure, Print Size 220x220x220mm |
|
| 7 | Creality Ender 3 V3 SE 3D Printer, 250mm/s Faster Print Speed CR Touch Auto Leveling Sprite Direct Extruder Dual Z-Axis Auto Filament Loading Ender 3 Upgrade 3D Printer Print Size 8.66x8.66x9.84 inch |
|
| 8 | Creality K2 SE Combo 3D Printer, Support Multicolor Printing with CFS, 500mm/s High-Speed, Smart Auto Leveling, Solid Metal Build Frame, Fully Assembled, Next-Gen Extruder, 220×215×245 mm Build Volume |
|
| 9 | FLASHFORGE AD5X Multi-Color 3D Printer, CoreXY 600mm/s High-Speed, 1-Click Auto Leveling, 300°C Direct Drive Extruder, 220x220x220mm Build Volume, Ideal for Precision and Efficiency |
|
| 10 | Anycubic Multicolor 3D Printer, Kobra S1 Combo Core XY Stable Structure with Sealed Printing High Precision 600mm/s Fast Speed Auto Calibration Ideal for Precision and Efficiency 9.8\"x9.8\"x9.8\" |
|
One of Cura’s most significant advantages is its accessibility. It’s completely free to download and use, making professional-grade slicing software available to everyone, from hobbyists to educational institutions and small businesses. This open-source nature also fosters a massive, active community that contributes to its continuous improvement and wealth of shared knowledge.
Intuitive User Interface for All Skill Levels
Cura strikes a remarkable balance between simplicity and power. Its clean, uncluttered interface ensures that beginners can get started quickly, preparing models for print in minutes using recommended settings. For those who enjoy fine-tuning, Cura offers an “Advanced Mode” with over 400 settings for granular control over every aspect of the print process. This gradual learning curve eases new users into 3D printing while satisfying the demands of experts.
Extensive Printer and Material Compatibility
While developed by Ultimaker, Cura is far from exclusive. It boasts extensive printer compatibility, supporting over 500 different 3D printers through customizable machine profiles. This means whether you own an Ultimaker, a Creality Ender 3, or another popular FDM printer, Cura likely has you covered. It also supports a vast array of filament types, allowing you to download material profiles from leading brands via its Marketplace, eliminating manual setup and ensuring optimal print results for different plastics and composites.
Powerful Slicing Engine and Customization
At its core, Cura features a robust, open-source slicing engine that meticulously converts your 3D models (like STL, OBJ, or 3MF files) into printer-ready G-code. Its intelligent algorithms optimize print paths for strength, surface finish, and dimensional accuracy, contributing to fewer print failures and consistently better results, especially on complex geometries. The sheer depth of customizable settings means you have unprecedented control to tailor prints precisely to your needs.
The Power of Intent Profiles
A standout feature that truly simplifies the workflow is Cura’s “Intent Profiles.” Introduced to streamline the often-complex setting adjustments, these profiles allow you to select a printing strategy based on your project’s goal with just a click. For example:
- Draft Profile: Ideal for quick iterations and concept validation, printing designs in the shortest possible time.
- Visual Quality Profile: Prioritizes aesthetics, producing super smooth surfaces and crisp looks for models where appearance is key.
- Engineering Profile: Focuses on high dimensional accuracy and strength, perfect for functional prototypes and mechanical parts.
These profiles take the guesswork out of configuring hundreds of settings, ensuring you get the desired outcome efficiently.
Ultimaker Marketplace for Plugins and Profiles
Cura’s open-source ethos extends to its Marketplace, a hub for community-developed add-ons and material profiles. This allows users to extend Cura’s functionality, download specific print profiles, and integrate new features, further customizing their print preparation experience. It’s a testament to the collaborative spirit that drives innovation in the 3D printing world.
Cloud Integration for Modern Workflows
For a truly streamlined experience, Ultimaker Cura offers robust cloud integration features. With an Ultimaker account, you can store your settings in the cloud, enabling access to your print profiles from any workstation. Features like remote printing and online printer management allow you to send files to your printer from anywhere with an internet connection, making collaboration and monitoring across your printer fleet incredibly efficient.
Getting Started with Ultimaker Cura
Ready to put Cura to work? Here’s a quick rundown to get you up and running:
Installation and Initial Setup
Downloading and installing Ultimaker Cura is straightforward. Once installed, the first step is to add your 3D printer. Cura offers pre-configured machine profiles for a vast range of popular 3D printers, which makes setup incredibly easy. You’ll typically enter details like your printer’s build volume, nozzle size, and number of extruders. This foundational step ensures Cura generates G-code precisely tailored to your machine’s specifications.
Understanding the User Interface
Cura’s interface is designed for logical progression. On the left, you’ll find tools for moving, scaling, and rotating your model. The right-hand panel is where you manage print settings, including selecting your printer, material, and print profile. The main build plate area provides a visual representation of your model within your printer’s build volume. Familiarizing yourself with these areas will make your workflow much smoother.
Importing and Positioning Your 3D Model
Importing a 3D model is as simple as dragging and dropping an STL, OBJ, or 3MF file onto the build plate, or using the “Open File(s)” option. Once imported, use the tools on the left to scale, rotate, and position your model for optimal printing. Ensuring your model fits within the build plate and is oriented correctly for stability and minimal support is crucial.
The Slicing Process: From Model to G-code
After preparing your model, you’ll select a print profile (or customize settings) and hit the “Slice” button. Cura then processes your model, dividing it into hundreds of horizontal layers and generating the precise toolpaths the printer will follow. The “Preview” mode is invaluable here, allowing you to visualize each layer, support structures, and travel moves before committing to a print. Finally, you’ll export the G-code file (or save directly to a removable drive) and load it into your 3D printer.
Demystifying Key Cura Settings for Optimal Prints
Mastering Cura means understanding how its settings impact your final print. Here are some critical parameters to tweak:
Layer Height: Quality vs. Speed
The layer height defines the thickness of each individual printed layer.
- Thinner layers (e.g., 0.1mm): Produce smoother surfaces and capture finer details, ideal for aesthetic models. However, they significantly increase print time.
- Thicker layers (e.g., 0.2mm – 0.3mm): Print much faster but result in more visible layer lines and less detail, often suitable for prototypes where speed is a priority.
The optimal setting balances your desired print quality with acceptable print duration. Many users find 0.2mm a good default for general prints.
Wall Thickness and Line Width: Strength and Detail
Walls (or perimeters) form the outer and inner shells of your print.
- Wall Thickness: This setting determines the number of lines making up your walls. A thicker wall (e.g., two or three times the nozzle diameter) generally leads to a stronger model.
- Line Width: Typically set close to your nozzle size (e.g., 0.4mm for a 0.4mm nozzle). Adjusting this can influence extrusion rate and print quality.
For most prints, two to three perimeters provide a good balance of strength and print speed.
Infill Settings: Structure, Weight, and Material Efficiency
Infill refers to the internal structure of your print.
- Infill Density: A higher percentage (e.g., 20-30%) creates a denser, stronger part, but uses more material and increases print time. Lower densities (e.g., 10%) are suitable for models that don’t require high strength.
- Infill Pattern: Cura offers various patterns (e.g., Grid, Triangles, Gyroid). Gyroid is often favored for its omnidirectional strength.
Optimizing infill allows you to control the strength, weight, and material consumption of your prints effectively.
Print Speed: Balancing Quality and Efficiency
Print speed dictates how fast your print head moves during extrusion.
- Higher speeds (above 100mm/s): Can reduce print time significantly but may compromise dimensional accuracy and surface finish, potentially leading to issues like ringing or ghosting.
- Lower speeds (40-60mm/s): Allow filament more time to cool and solidify, improving details, overhangs, and overall print quality, especially for intricate models.
Finding your printer’s “sweet spot” usually involves some experimentation, often starting around 50-60 mm/s and adjusting incrementally.
Supports and Adhesion: Ensuring Print Success
These settings are crucial for successful first layers and prints with overhangs.
- Supports: Essential for printing features that would otherwise print in mid-air. Cura can generate “Touching Buildplate” supports (for overhangs connected to the bed) or “Everywhere” supports (for complex geometries). “Tree Supports” are a popular option, offering material savings and easier removal.
- Build Plate Adhesion: Prevents prints from warping or detaching. Options include:
- Brim: Adds a single-layer skirt around the base for increased surface contact.
- Raft: Creates a full base layer under your print for maximum adhesion, useful for small footprints.
- Skirt: A few lines around the print that don’t touch it, primarily for priming the nozzle.
A well-calibrated and appropriately heated print bed, combined with the right adhesion setting, is key to preventing warping.
Retraction Settings: Conquering Stringing
Stringing (or oozing) occurs when thin strands of filament appear between parts of your print during travel moves. Retraction settings are your primary defense:
- Retraction Distance: How far the filament is pulled back into the nozzle. Increasing this can reduce stringing.
- Retraction Speed: How quickly the filament is retracted. A faster speed often helps.
Experimenting with these settings, often around 6mm distance and 40mm/s speed for Bowden setups, can dramatically reduce stringing.
Cooling: Managing Overhangs and Bridging
Proper cooling is vital for good print quality, especially for overhangs and bridges.
- Cooling Fan Speed: Controls the fan blowing on the printed filament. PLA generally benefits from 100% fan speed after the first few layers. Some materials like ABS prefer reduced cooling to prevent cracking.
- Minimum Layer Time: Ensures each layer has enough time to cool and solidify before the next layer is deposited, preventing “melting” issues on small features.
Troubleshooting Common Cura 3D Printing Problems
Even with optimized settings, you might encounter issues. Here’s how Cura helps you tackle common 3D printing problems:
Warping and Bed Adhesion Issues
Problem: Print corners lift off the build plate, causing distortion.
Cura Fixes:
- Increase Initial Layer Height: A thicker first layer often adheres better.
- Increase Bed Temperature: A slightly higher bed temperature can improve adhesion.
- Use Brim or Raft: These adhesion aids increase the contact area with the build plate.
- Enable Draft Shield: Creates a wall around your print to minimize temperature fluctuations.
Stringing and Oozing
Problem: Unwanted fine strands of filament between printed parts.
Cura Fixes:
- Optimize Retraction Settings: Increase retraction distance and/or speed.
- Lower Printing Temperature: Excessive heat makes filament more fluid, increasing oozing. Try lowering the nozzle temperature by 5-10°C.
- Enable Coasting: Stops extrusion slightly before a travel move, relieving pressure.
Poor Layer Adhesion
Problem: Layers don’t stick well, leading to weak or delaminated prints.
Cura Fixes:
- Increase Extrusion Temperature: Slightly higher nozzle temperature can improve bonding between layers.
- Reduce Print Speed: Slower speeds allow more time for layers to fuse properly.
- Adjust Flow Rate: Increase the flow value in 5% increments to ensure enough material is being laid down.
Print Not Slicing / Model Errors
Problem: Cura fails to slice your 3D model, or the model has missing surfaces.
Cura Fixes:
- Check Model Size: Ensure the model fits within your printer’s build plate. Scale down or split large models.
- Repair Model: If the model has manifold errors (incomplete or overlapping geometry), consider using a 3D modeling software or online tools to repair it before importing into Cura.
- Update Cura: Ensure you’re running the latest version, as updates often include bug fixes.
- Reset Cura to Factory Settings: As a last resort, but be aware you might lose custom profiles (though cloud sync helps here!).
Clogged Nozzle
Problem: Filament stops extruding or extrudes inconsistently.
Cura Related Fixes (indirect):
- Optimize Printing Temperature: Too low or too high temperatures can cause filament to not flow properly or degrade.
- Adjust Retraction Settings: Excessive retraction can sometimes grind filament, leading to clogs.
- Check Filament Diameter: Ensure your material settings in Cura accurately reflect your filament’s diameter.
Pro Tips for Mastering Cura
To truly elevate your 3D printing game, consider these pro tips:
- Experiment with Intent Profiles: Don’t just stick to the default. Try Draft for quick checks, Visual for stunning displays, and Engineering for robust, functional parts. They are designed to save you time and provide excellent starting points.
- Leverage the Preview Mode: This is your crystal ball! Always use the Preview mode after slicing to inspect layer paths, support structures, and potential problem areas before you print.
- Join the Community: The Ultimaker Cura community is a treasure trove of knowledge. From forums to online groups, you’ll find shared profiles, troubleshooting tips, and endless inspiration.
- Stay Updated: Regularly update your Cura software to benefit from the latest features, bug fixes, and performance improvements.
- Consider Cura Enterprise for Professional Use: For businesses requiring enhanced stability, security, and large-scale deployment, Cura Enterprise offers tailored features like cross-platform system distribution and regular, thoroughly tested updates.
“Cura’s balance of robust features and user-friendliness truly sets it apart. It allows you to focus on innovation, knowing the slicing process is handled with precision,” says Dr. Anya Sharma, a leading expert in additive manufacturing.
Frequently Asked Questions (FAQ)
Q1: What is Ultimaker Cura, and why should I use it?
Ultimaker Cura is a free, open-source 3D printing slicing software developed by Ultimaker. It translates your 3D models into instructions (G-code) that your 3D printer can understand. You should use it because of its user-friendliness for beginners, extensive customization for experts, broad printer compatibility, and powerful features that ensure high-quality prints.
Q2: Is Cura compatible with my 3D printer if it’s not an Ultimaker?
Yes, Cura is compatible with hundreds of different 3D printers, including popular models like the Creality Ender 3. It offers customizable machine profiles that allow it to generate G-code for a vast range of non-Ultimaker machines, as long as they don’t require proprietary software.
Q3: What are “Intent Profiles” in Cura, and how do they help?
Intent Profiles are preset print configurations tailored for specific printing goals, such as speed (Draft), visual quality (Visual), or mechanical strength and accuracy (Engineering). They simplify the slicing process by automatically adjusting hundreds of settings to achieve your desired outcome with a single click, saving you time and effort.
Q4: How do I fix common print problems like stringing or warping in Cura?
Many common print problems can be addressed through Cura’s settings. For stringing, adjust retraction distance and speed, and potentially lower the printing temperature. For warping, ensure good bed adhesion by using a brim or raft, increasing initial layer height and bed temperature, and enabling a draft shield.
Q5: What are the most important Cura settings for print quality?
Key settings impacting print quality include Layer Height (thinner layers for more detail), Wall Thickness (more walls for stronger prints), Print Speed (slower for better detail), and Cooling settings (for overhangs and bridges). Understanding and optimizing these will significantly improve your print results.
Q6: Can Cura help me manage multiple 3D printers or print remotely?
Yes, with an Ultimaker account, Cura offers cloud integration features through the Ultimaker Digital Factory. This allows you to sync your print profiles across devices, remotely send print jobs to your connected printers, and manage them online, which is ideal for multi-printer setups and collaborative environments.
Q7: Where can I find additional resources or help for Cura?
Cura benefits from a large, active community. You can find extensive documentation, troubleshooting guides, and user-shared profiles on the Ultimaker website, in online forums, Reddit communities, and through the Ultimaker Marketplace for plugins and material profiles.
Conclusion
Ultimaker Cura is more than just a slicer; it’s an ecosystem designed to make 3D printing accessible, efficient, and endlessly creative. From its free, open-source nature and intuitive interface to its powerful customization options and innovative Intent Profiles, Cura empowers you to achieve exceptional results, print after print. By understanding its core features and diligently fine-tuning settings, you can overcome common challenges and unlock a world of possibilities for your 3D printing projects.
So, go ahead, download Ultimaker Cura, and start experimenting. Don’t be afraid to delve into those settings, explore the Marketplace, and leverage the community’s wisdom. The journey to mastering your 3D printer begins with mastering your slicer, and with Cura by your side, you’re well-equipped for success. We at WMTSV.com are confident that with Cura, you’ll not only solve your 3D printing problems safely and effectively but also push the boundaries of what you thought was possible. Happy printing!