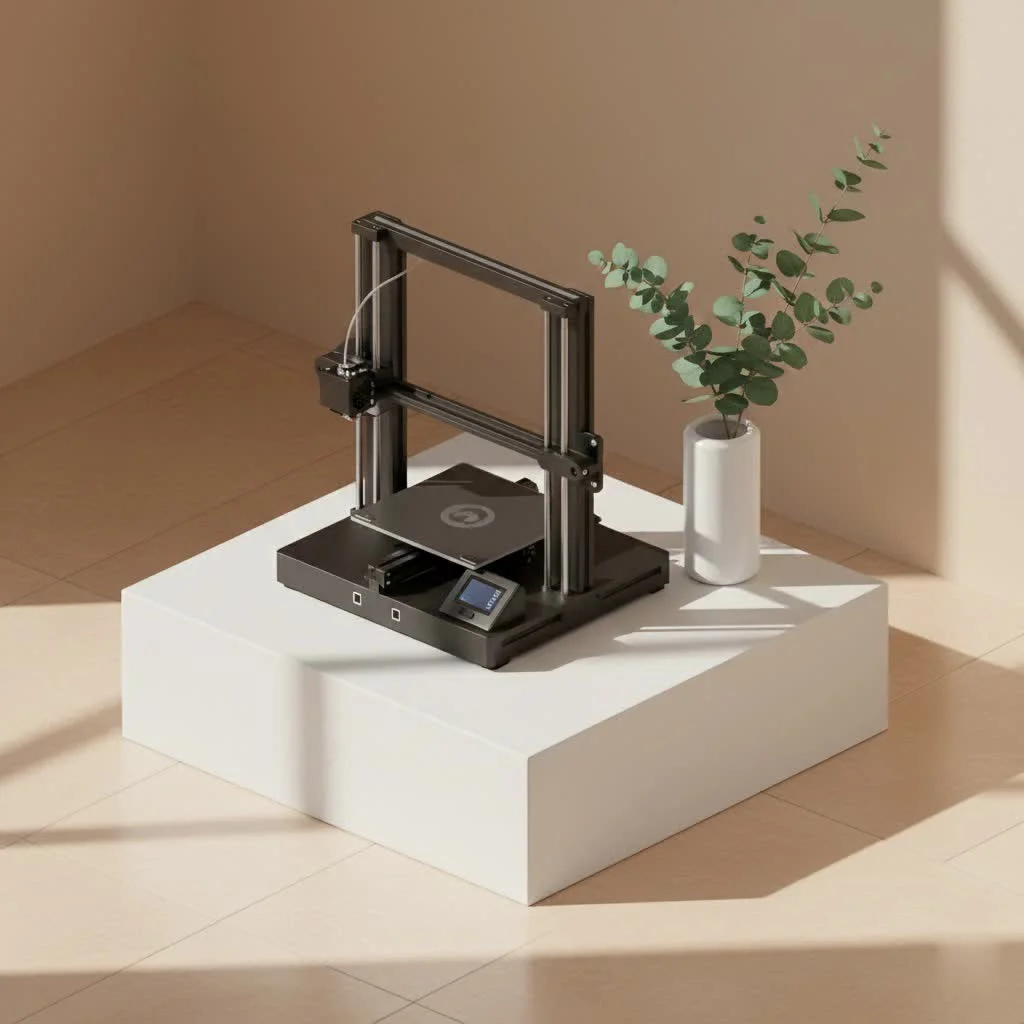
The Ender 3D printer series is an excellent choice for beginners and experienced makers alike, offering an accessible, affordable, and highly versatile platform for additive manufacturing. Since its original release, the Ender 3 has democratized 3D printing, providing a generous build volume (typically 220x220x250mm) and surprisingly decent print quality at an entry-level price point, making it a reliable starting point for countless enthusiasts.
At WMTSV, with over 15 years immersed in the practical realities of 3D printing, we’ve witnessed firsthand the Ender 3’s transformative impact. It’s not just a machine; it’s a gateway to creativity, a platform for learning, and a shows what open-source principles can achieve. Whether you’re a complete novice eager to print your first trinket or an experienced maker looking for a versatile workhorse, the Ender 3 ecosystem offers a path for everyone.
Why the Ender 3 Remains a Top Choice for 3D Printing Enthusiasts
The enduring popularity of the Ender 3 isn’t just hype; it’s built on a solid foundation of accessibility, performance, and community support.
The Appeal of the Ender 3: Affordability Meets Performance
When the original Ender 3 first hit the market, it disrupted the landscape of consumer 3D printers. Before its arrival, obtaining a capable FDM (Fused Deposition Modeling) printer often meant shelling out a significant sum. The Ender 3, however, delivered surprisingly decent print quality and a generous build volume (typically 220x220x250mm) at an entry-level price point. This affordability immediately lowered the barrier to entry, allowing a much broader audience to explore 3D printing without breaking the bank. Its sturdy, all-metal frame (on earlier models) and relatively simple assembly made it a robust and understandable machine.
“The Ender 3 didn’t just sell printers; it ignited a passion for 3D printing in a generation of makers who previously thought it was out of reach,” notes Dr. Lena Petrova, a veteran additive manufacturing researcher. “Its combination of low cost and high potential created an unstoppable force in the market.”
A Thriving Community: Your Support Network
Perhaps one of the most invaluable aspects of owning an Ender 3D printer is the colossal, vibrant community that surrounds it. From online forums and social media groups to YouTube tutorials and dedicated subreddits, help is always just a few clicks away. This collective knowledge base is a treasure trove for beginners, offering solutions to common issues, guidance on print settings, innovative upgrade ideas, and endless inspiration for projects. This strong community not only helps users overcome challenges but also fosters a sense of belonging, making the learning curve less steep and far more enjoyable.
Navigating the Ender 3 Family: Which Version is Right for You?
The Ender 3 isn’t a single printer; it’s a lineage. Creality has continuously evolved the series, introducing various models and iterations to cater to different needs and budgets. Understanding these distinctions is key to choosing the right Ender 3D printer for your journey.
Ender 3 & Ender 3 Pro: The Original Workhorses
|
Our Picks for the Best 3D Printer in 2026
As an Amazon Associate I earn from qualifying purchases.
|
||
| Num | Product | Action |
|---|---|---|
| 1 | FLASHFORGE AD5M Pro 3D Printer 600mm/s High Speed & Precision, Full-Auto Calibration with 0.4&0.6mm Nozzle Bundle, CoreXY Structure & Auxiliary Chamber Cooling, ≤50 dB Quite Printing Camera Printers |

|
| 2 | Anycubic Multicolor 3D Printer, Kobra S1 Combo Core XY Stable Structure with Sealed Printing High Precision 600mm/s Fast Speed Auto Calibration Ideal for Precision and Efficiency 9.8\"x9.8\"x9.8\" |
|
| 3 | FLASHFORGE AD5X Multi-Color 3D Printer with IFS, 600mm/s High Speed, 300°C High Temp Direct Extruder, Fully Auto Leveling, All Metal CoreXY,4-Color Printing for PLA-CF,PETG-CF, 220x220x220mm |
|
| 4 | FLASHFORGE Adventurer 5M 3D Printer with Fully Auto Leveling, Max 600mm/s High Speed Printing, 280°C Direct Extruder with 3S Detachable Nozzle, CoreXY All Metal Structure, Print Size 220x220x220mm |
|
| 5 | FLASHFORGE AD5M 3D Printer Fully Auto Calibration Print with 1-Click Max 600mm/s Speed, All-Metal CoreXY Structure Precise Printing, Easy-Maintenance Quick-Swap Nozzle, Print Size 220x220x220mm |
|
| 6 | FLASHFORGE AD5X Multi-Color 3D Printer, CoreXY 600mm/s High-Speed, 1-Click Auto Leveling, 300°C Direct Drive Extruder, 220x220x220mm Build Volume, Ideal for Precision and Efficiency |
|
| 7 | FLASHFORGE Adventurer 5M Pro 3D Printer with 1 Click Auto Printing System, 600mm/s High-Speed, Quick Detachable 280°C Nozzle, Core XY All-Metal Structure, Multi-Functional 220x220x220mm 3D Printer |
|
| 8 | Creality K2 SE Combo 3D Printer, Support Multicolor Printing with CFS, 500mm/s High-Speed, Smart Auto Leveling, Solid Metal Build Frame, Fully Assembled, Next-Gen Extruder, 220×215×245 mm Build Volume |
|
| 9 | Creality Ender 3 V3 SE 3D Printer, 250mm/s Faster Print Speed CR Touch Auto Leveling Sprite Direct Extruder Dual Z-Axis Auto Filament Loading Ender 3 Upgrade 3D Printer Print Size 8.66x8.66x9.84 inch |
|
| 10 | FLASHFORGE AD5X Multi-Color 3D Printer 4 Colors with IFS, Fully Auto Leveling FDM 3D Printer with Max 600mm/s High Speed Printing and Max 300°C Nozzle, Large Printing Size 220 * 220 * 220mm |
|
The original Ender 3 set the standard for budget-friendly performance. It’s a DIY kit that requires some assembly, a process that many beginners find incredibly educational as it demystifies the printer’s mechanics. The Ender 3 Pro, released shortly after, built upon this success with a few key enhancements. It typically included a more stable power supply and, most notably, a removable magnetic build plate. This magnetic bed significantly improved print adhesion and made removing finished objects much easier, a huge quality-of-life upgrade for daily use.
Ender 3 V2: Enhanced Experience and Silent Operation
The Ender 3 V2 brought significant user experience improvements. A standout feature was the inclusion of a silent mainboard, drastically reducing the noise produced by stepper motors during printing. This made the V2 far more suitable for home or office environments. It also featured a tempered glass print bed, offering a flatter surface and better adhesion, along with a color screen and convenient rotary knobs for belt tensioning.
Ender 3 S1 Series (S1, S1 Pro, S1 Plus): Direct Drive and Auto-Leveling
The Ender 3 S1 marked a major shift by incorporating a direct drive extruder, Creality’s “Sprite” extruder. Unlike the Bowden system in earlier models, direct drive places the extruder motor directly above the hotend, offering better control over filament, especially for flexible materials like TPU. The S1 also introduced Creality’s CR Touch auto-leveling system, simplifying the often-tricky bed leveling process. The Ender 3 S1 Pro further elevated this, featuring an all-metal hotend capable of reaching 300°C for printing more advanced filaments like nylon, a PEI-coated build plate, and a touchscreen. The Ender 3 S1 Plus provided an even larger build volume, catering to those needing to print bigger objects.
Ender 3 Neo Series: Refinements on Classics
The Neo series (Ender 3 Neo, Ender 3 V2 Neo, Ender 3 Max Neo) served as a refresh for some of the earlier models, often integrating popular upgrades as standard. These typically included CR Touch auto-leveling and silent mainboards, making them excellent choices if you’re looking for an updated version of a classic Ender 3 model with modern conveniences. For instance, the Ender 3 Neo Max offered a larger build volume similar to the S1 Plus but with a different set of features.
Ender 3 V3 Series (V3 SE, V3 KE, V3): Speed and Smart Features
The latest generation, the Ender 3 V3 series, focuses heavily on speed, ease of use, and smart features. The Ender 3 V3 SE is an incredibly popular budget option that combines a direct drive extruder, CR Touch auto-leveling, and respectable print speeds, making it a fantastic plug-and-play choice for beginners. The Ender 3 V3 KE significantly boosts print speeds (up to 500mm/s), adds a Klipper-based firmware for advanced control, and features a user-friendly screen interface. The flagship Ender 3 V3 pushes the boundaries further with even higher speeds (up to 600mm/s), advanced strain-based auto-leveling, a quick-swap nozzle system, and an integrated bimetallic heatbreak, making it a formidable machine for both speed and material versatility.
Essential Upgrades to improve your Ender 3 Experience
One of the greatest joys of owning an Ender 3D printer is the endless potential for customization and upgrading. Many affordable enhancements can significantly improve print quality, reliability, and user experience.
Must-Have Upgrades for Enhanced Performance
- Auto Bed Leveling (CR Touch/BLTouch): This is often considered the most impactful upgrade. A CR Touch or BLTouch sensor automatically probes your print bed at multiple points, compensating for any unevenness. This virtually eliminates the frustration of manual bed leveling and ensures a perfect first layer every time, which is critical for successful prints.
- PEI Spring Steel Plate: While glass beds are good, a PEI (Polyetherimide) spring steel plate takes adhesion and print removal to another level. Prints stick well when hot and, once cooled, often pop right off with a gentle flex of the plate. This makes retrieving your finished objects incredibly easy and reduces the risk of damaging them.
- All-Metal Extruder: Many earlier Ender 3 models come with a plastic extruder arm that can wear out or crack over time. Upgrading to an all-metal extruder (often gold-colored) ensures more consistent filament feeding, prevents filament grinding, and provides greater durability.
- Silent Mainboard: If your Ender 3 isn’t already equipped with one, a silent mainboard (like Creality’s 4.2.7 or a BigTreeTech SKR Mini E3) is a major upgrade. It replaces the noisy stepper motor drivers with much quieter ones, transforming your printer from a buzzing distraction into a gentle hum.
- Capricorn PTFE Tubing: For Bowden setups (where the extruder motor is separate from the hotend), Capricorn PTFE tubing offers tighter tolerances and lower friction than standard PTFE. This results in smoother filament travel, especially beneficial for flexible filaments, and can help reduce issues like stringing and under-extrusion.
Advanced Upgrades for the Enthusiast
For those looking to push their Ender 3D printer even further, several advanced upgrades unlock new capabilities:
- Direct Drive Conversion: If your Ender 3 uses a Bowden system, a direct drive conversion moves the extruder motor closer to the hotend. This dramatically improves printing with flexible filaments, offers finer control over extrusion, and can reduce retraction issues. Many S1 and V3 series printers already come with direct drive extruders.
- Klipper Firmware: Klipper is an open-source firmware that offloads processing from the printer’s mainboard to a more powerful single-board computer, like a Raspberry Pi or Creality Sonic Pad. This enables significantly faster print speeds with improved quality through features like input shaping and pressure advance, offering unparalleled control and customization.
- Enclosure: To print engineering-grade filaments like ABS, ASA, or Nylon, a stable, warm printing environment is crucial. An enclosure helps maintain a consistent temperature, prevents drafts, and can reduce warping, improving print success rates for these sensitive materials.
Common Troubleshooting Tips for Smooth Printing
Even the most reliable 3D printer can encounter hiccups. Knowing how to diagnose and fix common issues will save you time and frustration.
First Layer Woes: Adhesion and Leveling
The first layer is arguably the most critical part of any 3D print. If it doesn’t stick properly or is uneven, the rest of your print is doomed.
- Clean Your Print Bed: Oils from your fingers, dust, or residual filament can all prevent adhesion. Clean your print bed with isopropyl alcohol (for glass/PEI) or soap and water (for glass).
- Level Your Bed: Manual leveling involves adjusting the bed’s corners so the nozzle is an even distance from the surface. A simple paper test, where a piece of paper slides with slight resistance between the nozzle and bed, is an excellent starting point. If you have an auto-leveling sensor, ensure it’s calibrated correctly and your Z-offset is properly set (the exact height of the nozzle from the bed after leveling).
- Adjust Z-Offset: If your nozzle is too far from the bed, the filament won’t stick; too close, and it will scrape or squish too thin. Fine-tune your Z-offset during the first layer of a test print.
Extrusion Issues: Clogs and Under-extrusion
When your printer isn’t laying down enough filament, or any at all, you’re facing extrusion problems.
- Filament Tangles: Check your filament spool. A tangle can create resistance, causing the extruder motor to skip steps and leading to under-extrusion or failed prints. Ensure your filament feeds smoothly.
- Nozzle Clogs: Over time, tiny bits of burnt filament or debris can accumulate in the nozzle. Perform a “cold pull” (heating the nozzle, pushing filament through, then letting it cool slightly before quickly pulling it out) or use a thin acupuncture needle to clear the clog.
- PTFE Tube Gap (Bowden Systems): In Bowden setups, a gap between the end of the PTFE tube and the nozzle can cause filament to accumulate and clog. Ensure your PTFE tube is cut cleanly and seated firmly against the nozzle. Upgrading to Capricorn tubing can also help here.
Print Quality Problems: Stringing, Layer Shifts, Blobs
These aesthetic issues can be frustrating but are usually fixable with setting adjustments.
- Stringing: Fine wisps of plastic between printed parts are often caused by incorrect retraction settings (how much filament is pulled back when the nozzle moves between sections) or too high a printing temperature.
- Layer Shifts: If your print appears to “shift” horizontally mid-way through, it’s usually due to loose belts on your X or Y axes, or the print head physically bumping into a warped part. Check belt tension and ensure print doesn’t curl excessively.
- Blobs/Zits: Small imperfections on the surface can be due to excessive filament oozing, incorrect retraction, or issues with filament moisture. Drying your filament can often help.
Abnormal Noises and Error Codes
Strange sounds or error messages usually point to specific hardware issues.
- Fan Noise: Worn-out fans or debris caught in fan blades can cause excessive noise. Inspect and clean or replace fans as needed.
- Thermal Runaway Error (e.g., “2092 Error”): This critical safety feature indicates a problem with temperature sensing (thermistor) or heating elements (heater cartridge). Immediately check wiring for the hotend and heated bed. Never ignore these errors, as they can be fire hazards. If you see erratic temperature readings, a thermistor replacement is often the solution.
My Personal Take: Why the Ender 3 Series Still Rocks
Having worked with 3D printers for over 15 years, from industrial machines costing tens of thousands to the humblest desktop models, I can confidently say the Ender 3D printer series holds a special place. It’s more than just a tool; it’s an educational platform. The initial assembly, the common troubleshooting, and the vast array of upgrades teach you the fundamental principles of additive manufacturing in a way few other printers do. It demystifies the technology, empowering users to understand not just how to print, but why certain settings or modifications make a difference.
For anyone looking to dive into 3D printing, the Ender 3, in its various iterations, still offers incredible value. It provides a robust framework for learning, a supportive community for guidance, and the flexibility to grow with your skills and ambitions. You can start simple and, with a few strategic upgrades, improve your entry-level machine into a high-performance printing powerhouse. The journey with an Ender 3 is often as rewarding as the final prints it produces.
Frequently Asked Questions (FAQ)
Is the Ender 3 good for beginners?
Absolutely! The Ender 3 series is widely recommended for beginners due to its affordability, the educational value of its assembly (for older models), decent out-of-the-box print quality, and an incredibly supportive global community that provides extensive resources and troubleshooting help. The newer V3 SE and V3 KE models are particularly beginner-friendly with auto-leveling and direct drive extruders.
What’s the difference between Ender 3 and Ender 3 V2?
The Ender 3 V2 is an upgraded version of the original Ender 3. Key differences include a quieter mainboard, a tempered glass print bed, a color screen, and improved belt tensioners, offering a more refined user experience compared to the more basic original.
What are the most important upgrades for an Ender 3?
The most impactful upgrades often include an auto bed leveling sensor (CR Touch/BLTouch), a PEI spring steel build plate, an all-metal extruder, and a silent mainboard. These significantly enhance print quality, reliability, and user comfort.
Can the Ender 3 print flexible filaments?
Yes, but it depends on the specific Ender 3 model and any modifications. Older Bowden-style Ender 3 printers can print flexible filaments like TPU with some adjustments (e.g., Capricorn PTFE tubing, slower speeds). Newer models like the Ender 3 S1 series and V3 series, which feature direct drive extruders, are much better equipped to handle flexible materials right out of the box.
How often should I level my Ender 3 bed?
If you have manual bed leveling, you should check and adjust your bed leveling before almost every print, or at least every few prints, especially if you’re experiencing adhesion issues. With an auto bed leveling sensor (like CR Touch), you typically only need to run the auto-leveling routine periodically (e.g., once a week or after moving the printer) and verify your Z-offset.
Conclusion
The Ender 3D printer series has earned its reputation as a cornerstone of the 3D printing world, providing an accessible and robust entry point for countless individuals. From its humble beginnings to its latest high-speed, feature-rich iterations, the Ender 3 continues to embody versatility, moddability, and exceptional community support. At WMTSV, we firmly believe in the power of this technology to empower creativity and foster learning. So, whether you’re taking your first tentative steps or seeking to expand your existing capabilities, an Ender 3D printer offers a reliable, rewarding, and endlessly upgradable platform for bringing your digital designs to life. It’s truly a journey where the only limit is your imagination.
Frequently Asked Questions
Is the Ender 3 series a good choice for beginners in 3D printing?
Yes, the Ender 3 series is highly recommended for beginners due to its affordability, decent print quality, and a very supportive global community. Newer models like the V3 SE and V3 KE are particularly user-friendly, featuring auto-leveling and direct drive extruders.
What are the main differences between the Ender 3 and Ender 3 V2 models?
The Ender 3 V2 is an enhanced version of the original Ender 3. Key improvements include a quieter mainboard, a tempered glass print bed for better adhesion, a color screen, and improved belt tensioners, providing a more refined user experience.
Which upgrades are most important for improving an Ender 3D printer?
The most impactful upgrades for an Ender 3 often include an auto bed leveling sensor (like CR Touch or BLTouch), a PEI spring steel build plate, an all-metal extruder for consistent filament feeding, and a silent mainboard to reduce operational noise.
Can Ender 3 printers successfully print flexible filaments like TPU?
Yes, Ender 3 printers can print flexible filaments, though capabilities vary by model. Older Bowden-style Ender 3s may require adjustments like Capricorn PTFE tubing and slower speeds. Newer models such as the Ender 3 S1 and V3 series, which feature direct drive extruders, are much better suited for flexible materials out of the box.
How frequently should I perform bed leveling on my Ender 3?
For manual bed leveling, it's advisable to check and adjust your bed before almost every print or every few prints, especially if you notice adhesion issues. If your printer has an auto bed leveling sensor (e.g., CR Touch), you typically only need to run the routine periodically, such as once a week or after moving the printer, and verify your Z-offset.
Get our weekly buyer guide
Practical specs, not advice. Unsubscribe anytime.
I’ve had my Ender 3 Pro for about six months now, and it’s been fantastic. The build volume of 220x220x250mm is perfect for most of the functional prints I do around the house. It really is a great starting point for anyone getting into 3D printing without breaking the bank. Highly recommend it for beginners.
This printer is a workhorse! I was worried about getting into additive manufacturing, but the Ender 3 ecosystem makes it so accessible. I’ve already upgraded a few parts and the open-source community support is incredible. It’s amazing what you can achieve with an entry-level machine like this.
The Ender 3 is pretty good for the price, but I did have some issues with bed leveling when I first got it. It took a bit of tweaking and watching a few YouTube videos to get consistent first layers. Once I got that sorted, the print quality has been surprisingly decent, but it wasn’t plug-and-play for me.
As someone who’s been curious about 3D printing for ages, the Ender 3 was exactly what I needed. The affordability factor was a huge selling point, and it truly has opened up a new world of creativity. I’ve been printing all sorts of little trinkets and prototypes, and it’s been a fun learning experience.